Thursday, July 28, 2011

Before and After: Painting Over Wallpaper

Thank you for your kind comments about our dining room saga.  Some of you asked if the color on the furniture complemented the color on the walls - it kind of doesn't.  The color palette in the room is cream/gray/citrine and now I have these stark white chairs and table.  It sticks out like a sore thumb.  Anyway, I'm trying to see if I can hijack a highschool student to help me repaint them!! 

Anyway, before we painted, our dining room had wallpaper.  Actually, it still does.  But now it just has paint over it! :)  The wallpaper was there before I moved in and it is just not me.  See below.


I find the stripes overbearing for our small dining room.  So, let me tell you 3 reasons why I chose to paint over the wallpaper instead of taking the wallpaper down.

1) Condition of walls.  The reason the wallpaper was hung in the first place was because the walls are not in great condition. I was concerned that after taking the wallpaper down I would probably have to skim coat and sand the walls to ensure an even and smooth surface.  This would be a pain.

2) Removing wallpaper is not always an easy task.  Sometimes the paper comes down in sheets and sometimes it doesn't.  And since I am pregnant and have no experience with this I decided not to go there.

3) Time and Money.  I wanted to get this done before the baby comes and since we're moving in the near future, I didn't want to waste too much time or money removing the wallpaper, sanding walls, etc. 

You get the picture.  So, how do you paint over wallpaper?  Well, here is a good tutorial that I followed, but I will give you a quick run down of how I went about it. 

1) Identify all the visible edges, as well as any loose/peeling wallpaper.  With a razor, carefully trim back any loose pieces.  See the seams below.


2) Next, put just a little joint compound (the mud used at joints in drywall) on any uneven spots - so this means all seams, edges, and places where loose wallpaper was removed.  This is the most important part, since you want the surface to be as smooth as possible before painting.

I had our painter do this and the key to having a seamless look is to ensure that the compound is "feathered" out properly (so the seam disappears).  If it is visible or bumpy, you'll need to sand it more.  Use 150 grit sandpaper or finer.


3) Once the compound is dry and sanded, you will need to prime over the wallpaper.  You need to use an oil based primer.  This is critical because the glue holding the wallpaper onto the wall is activated by water.  Putting latex (water based) paint on will just cause the wallpaper to fall off the wall, which is what we're trying to avoid.  Also, the primer is also the first step to hiding the wallpaper pattern, so it doesn't show through the top coat.  Oil based paint stinks ... so ventilate the area well.  

4) Now, you are ready to paint your walls.  The painter used two coats of latex paint (eggshell finish) and voila!


So that's it ... I love the new color (BM White Down).  It's just so much more airy and open.   

Tuesday, July 26, 2011

Dining Room Mood Board & Updates

Remember this post about my dining room?  I've been slowly making updates to it.  It's taking longer than usual mainly because at 32 weeks, I find myself exhausted most of the time.  The interior designer created a mood board for the space, I simplified it, but here is the jist of it.  

My Dining Room Mood Board


The walls have been painted which I think has been the biggest transformation.  We painted over wallpaper!!  I wouldn't recommend that for everyone, but there are a lot of reasons we decided to do that.  I plan on doing a separate post on that.  

Melissa, from Windows by Melissa, is making my roman shades.  I primed and my husband painted our sideboard and we got new hardware. 
We got a new rug and we painted our existing dining room table and chairs.  Since our DR table and chairs had a finish on it, I originally planned on using an oil based primer and a latex paint.  

But, I then learned about a product from Sherwin Williams called 'adhesion primer'.  It basically allows you to prime without sanding.  It bonds tightly to surfaces considered 'unpaintable' like, ceramics, PVC piping, furniture with existing stains, etc.  This would allow me to 'skip' the sanding and actually use a latex based primer instead of an oil based primer.  Latex is a lot easier to work with.  So, I bought it and tried it. 


The true test will be time, but I have to say it was a dream to use.  Now, here comes the major setback.  My husband (who didn't even want to re-do the dining room because we're moving soon) spent a half day (while I was at work) painting the table and chairs for me.  When we brought the furniture into the room, we noticed that color on the furniture was off and not the same as the walls.  (We're painting the furniture the same color as the walls).  We re-checked the paint can to confirm that it was the right color and number, but noticed that the formula used was different from the formula used on the walls.  I am so upset.  

We will go back to the paint store to complain, but you just can't get back all the time and labor that went into painting the table and chairs.  My poor husband.  So, right now, I have to figure out what to do, but I am so deflated.   So, stay tuned....this saga will be continued......

In other news, I want to thank Elizabeth from The Mustard Ceiling for featuring my hallway yesterday on her blog - see here


I was very flattered as she is a great designer and DIYer.  Her blog is full of amazing projects!!  Thanks, Elizabeth!

Friday, July 22, 2011

Can I move in, please?

I was catching up on blogs this week and came across an amazing home for sale in Ft. Worth, TX.  You might've seen it on La Dolca Vita and Nursery Notations.  Anyway, if you haven't, feast your eyes on this!


Amazing, right?  The interiors were designed by the couple and Leigh Taylor Interiors.  Live in Ft. Worth?  Check out the real estate listing.   Go over to La Dolce Vita or Nursery Notations to see more pictures. 

Wednesday, July 20, 2011

Before & After: Our Upstairs Hallway

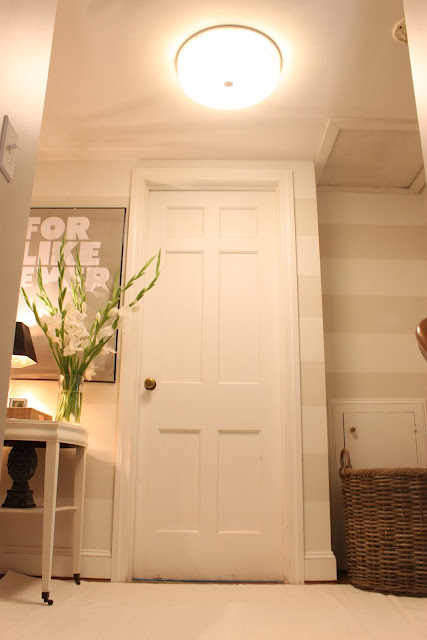
It's been forever since I last reported on our upstairs hallway.   I finally completed it.  If you remember (don't worry if you don't because it has been forever), we painted horizontal stripes on the walls.  I loved them, but found it difficult to decorate such a small space with bold walls.  My goal was to brighten the room and I was dead set on having a mirror in the hallway.  We lived with one for a long time, but I wasn't thrilled with it.  I finally ditched the idea and went the graphic route.  I love how it turned out.

After:


After:


Before:


Before:


Even though this took a long time, I have to say I took my time sourcing/finding the items for this hallway.  

Rug: Ikea Erslev
Ceiling fixture: Lowes (This makes the space.  It took me forever to find a stylish flush mount for our v. low ceilings)
Table lamp: Ikea Marby
Tray: West Elm
Poster: Super Rural
Book: Reader's Digest $9 (for a set of 3)
Table: Garage Sale $20
Lamp Shade: Garage Sale $5
Flowers: Gladiolus $5
Artichoke: Garage Sale $2

So, what do you think?  A big improvement in my opinion.  

Monday, July 18, 2011

Art Sale: Amanda Stone Talley

I learn so much design from reading blogs, online and shelter magazines - it never ceases to amaze me.  I've also learned a ton from experimenting with my own home and one thing I've realized is that 'art' really makes a home.  I could post a ton of pictures supporting my point, but I know you (my readers) understand and I don't need to convince you.


This past week, I invested in a piece of artwork from a talented artist (who I admire) and am so giddy with excitement.  Since my whole life is about living on a budget, this was a big decision because it is not everyday I have disposable income to invest in art.  But, it just so happens that Amanda Talley is having a Summer Sale on her drawings and I couldn't resist.


After a lot of deliberation, I (with the help of my husband) finally decided on a piece that we love (I am sure I love it more than my husband :)), but what I am thrilled about is that this piece will initially find its way in the nursery but will later be moved around the house.  I like the idea of putting 'adult' art in a nursery as to make it not so 'babyish'.  Here she is in all her glory...


Now, I can't wait for her to come home to mama!!  Think she'll look beautiful with a wide mat and a thin gold frame.  Go now to check out her sale!

Wednesday, July 13, 2011

Another All Time Favorite & Hable Construction Discount


During our 12 hour road trip to Michigan (and back) I brought all of my domino magazines and looked through each and every one of them.  It was so great revisiting these magazines and getting so inspired all over again! While browsing through the issues, I came across Rita Konig's apartment (an oldie but goodie) and realized how much I really love it.


I love her style and the infustion of english design in her apartment.  It really appeals to me.  In her new apartment (not pictured) she has balloon shades which I really like.  It brings back memories living in Belguim growing up.


She's really good at creating that slightly messy piled on British look. 

Her designs scream comfort and I'd like to create more of that look in my home.


So femnine and cozy.  If you notice under her console table there are two hable construction totes which she uses for storage.  I love this idea.  I've been in love with Hable Construction for a long time, but have held off in investing in a couple of pieces because of price.  Well, they are having a sale on their storage bushels. 


Go here!!

Monday, July 11, 2011

Nursery Inspiration

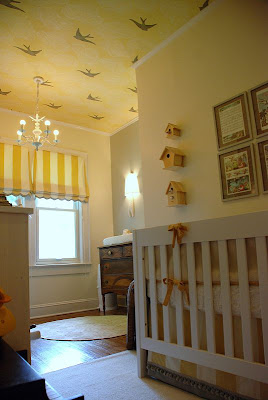
I have to admit that during my first two trimesters, I was a little scared to fully embrace this pregnancy (due to my previous complications).  But, now that I'm in my third trimester, I have baby on the brain. As it stands now, the baby will stay in our master bedroom for the first couple of months.  We plan to move at the end of this year (news forthcoming at some point) so I'm hesitant in investing time and money into any space at the moment.  However, in an ideal space, I would love to have a wallpapered ceiling (or some type of pattern on the ceiling) for this nursery.  


Domino

Store in Nantucket

I think it adds the right amount of whimsy/fantasy to the room, don't you agree?

Friday, July 8, 2011

A Short Jaunt to Jayson Home and Garden

I'm back from a wonderful vacation to Michigan and Chicago.  Lots of fun time with the inlaws - fireworks, boating, sunbathing, grilling and watching Luke have a blast with his cousins.

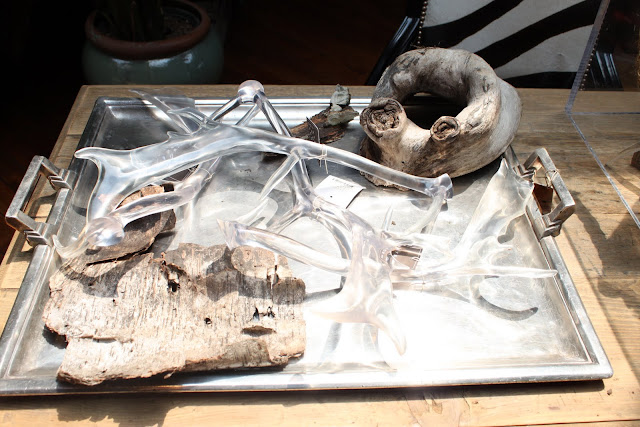
Kevin and I were able to get away to Chicago for a quick trip.  Having only been there once before, I was really excited.  An awesome city that offers both the city and beach life.  So cool.  We stopped at Jayson Home and Garden and while we there that place did not disappoint.  Here are some highlights.


LOVE!


So fabulous, enough said. 


Succulents were everywhere.  


Chrome chairs.  So sexy.  


I want, pretty please!!


Perfect shade of green.  Love the mix of modern & rustic.  

Acrylic antlers!!  

Inspiration for a DIY!


Love this fabric!  I'm kicking myself because I didn't find out the name of it.  


And, just one for good measure...I'm in my 3rd trimester - the countdown is on!

Friday, July 1, 2011

Taking a little Vacay


Happy July 4th weekend!!  We're in Michigan right now enjoying some R&R with the inlaws.  The hubby and I hope to make it to Chicago for a little getaway!!  I hope you all have a very relaxing and safe holiday weekend!!  Enjoy!!